 There come times when you are working with wood when you need to make a patch. Many repairs can be achieved simply with epoxy or wood filler. Sometimes though the repair area is just too large for either of those options. Other times you need to be sure that fasteners such as screws are able to hold strong, which also is not great with most epoxy or filler repairs. In these situations, fitting a wood patch into the piece, known as a Dutchman repair, is the best option.
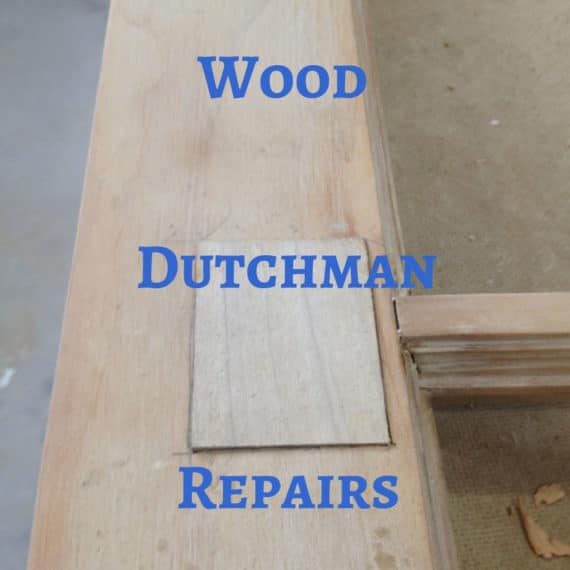
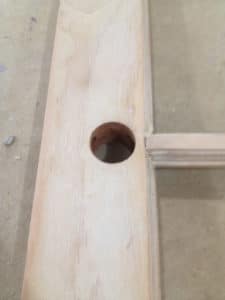
The examples we are working with here cover one of our most common situations that call for this type pf repair. The customer had an old door that they wanted to change the style and location of the handle-set hardware. The large hole that is left from the old set is way larger than epoxy could ever handle. In addition, often the new location is just slightly off of the original location, which again calls for something a bit more robust.
 As you will see in these photos, there is no need to have a full width patch. In fact, you need it to be less thick than the piece you are working on so that you have a base to set and glue it into. My go-to patch thickness is 1/2″. The first step is simply deciding the rough size of the patch you intend to use. You want it to be big enough that it will have nice glue adhesion but any bigger and it will just require more work or possibly compromise the stability of the original piece.
Once the size is decided, you need to find a piece of wood to use as a patch. It is always best to use the same species of wood as the original piece. If that is not an option, shooting for a wood of similar properties should suffice. In the example here, the patch is poplar and the door is eastern white pine. The properties of both of these woods is close enough. We just need woods that have similar expansion and contraction qualities. With your patch piece picked out, you now can cut it down to the size you want the patch to be. Be sure to have the directions of the wood grains match. I know it may seem strange cutting the patch before you cut the hole but it is in fact easiest to fit the hole to the patch rather than the patch to the hole.
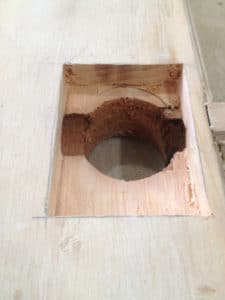
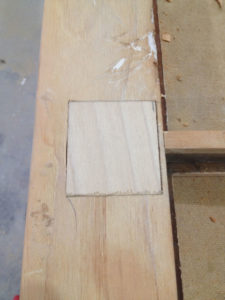
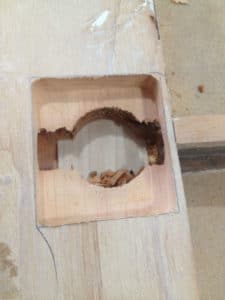 Now you will just trace the patch outline over the hole or area that you intend to patch. With that done, we now need to set the depth of the router to just short of the thickness of the repair piece. Then you can carefully use the router to remove the material up to the lines you marked. If your patch is particularly thick you may need to do this in 2 passes with the first at half depth. With most of the material removed, you can then finish it off with a chisel to clear the corners and fine tune the fit. Warning: As you are testing your patch only lightly fit it into the hole or else you may not be able to get it back out without causing damage.
When you are confident with a good fit, get a nice coat of wood glue on all mating surfaces and set the repair in. Now you can force it in place if you need to. As always a clamp or two should be used to hold the repair tight in place as the glue sets. Wipe away any excess glue and walk away. Once the glue has set up, you can remove the clamps and sand down the repair to a flush finish. If you have any gaps around the perimeter these can be filled with epoxy or wood filler. Dutchman complete!
 This is one of those repairs that the cost is all in the labor. The costs of the repair materials are nothing compared to the time and expertise involved to perform the task. This is a fairly intricate task to achieve well and efficiently. But once you have some practice it will become second nature. Even better, if you tend to be performing the same approximate sized repairs you can build jigs that can all but take the guesswork out of it. You would have one jig that cuts the patch to a specific size. Then you would have another jig that guides the router to an exact matching hole. This is a much quicker and more effective way to do it. But if you just have one patch to do, the time required to make the jig is more than it takes to do the actual repair in the first place. As great as the jig option is, I feel it is always important for people to know how to do it the old school (okay, Hard) way before they take the short cut. Then they are able to appreciate and value the skills of the craft as well as the value of the crafty shortcut of the jig. If you just started with the jig they would never respect it like they would or should. Okay, I will get off my soapbox now and let you go patch some wood. Have fun!